How to Sync Xero to Microsoft Excel (Automatic and Manual Options)
Learn how to sync Xero to Microsoft Excel
Every week, there’s a new flashy tool promising to “kill spreadsheets”, but does any accountant actually want that? I sure don’t. A spreadsheet is my favourite tool for reporting, analytics, and understanding the numbers of a business.
And that's not going to change.
The only problem is the time-consuming manual data entry process of getting Xero data into a spreadsheet like Microsoft Excel.
But there’s a better way.
I’m going to show you two ways of how you can sync your Xero data into Excel. I’ll walk through each approach so you can choose what works best for you and your firm.
Manual Export from Xero
Xero has built-in export features that let you download data as CSV or Excel files. This method is quick to set up and doesn’t require any extra tools, but you must repeat it every time you need fresh data and for every client organisation. Here’s the manual process:
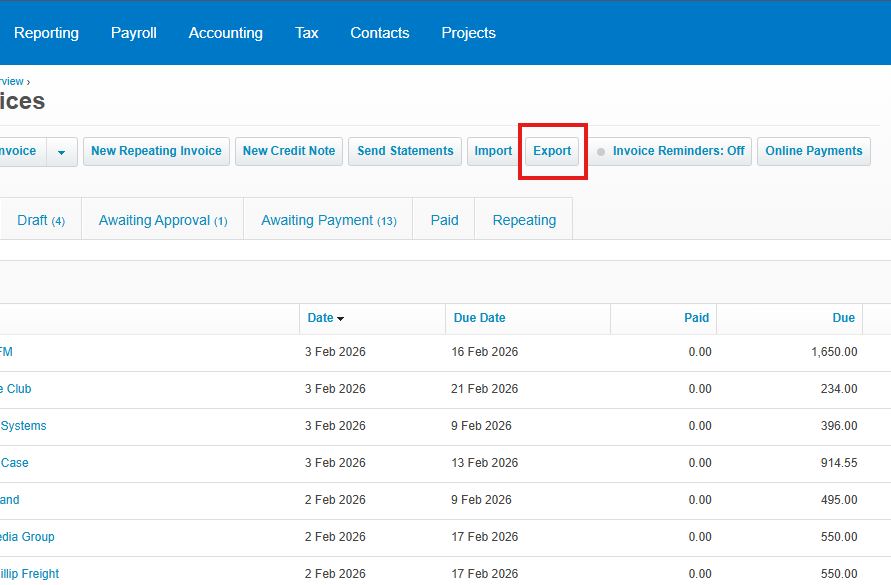
- Log in to Xero: Open your Xero account and go to the section you need. For example, to export invoices, go to Business > Invoices, or for financial reports, go to Accounting > Reports.
- Select and filter data: In the Xero page (Invoices, Bills, Bank Transactions, etc.), choose the date range or filters you want. On reports, pick the report (e.g. Profit & Loss, Balance Sheet) and set any parameters.
- Download the data: Look for an Export or Download CSV/Excel button (usually near the top of the page). Click it to download your selected data as a CSV or XLSX file.
- Open in Excel: Open the downloaded file in Microsoft Excel. You can now format it, create charts, or combine it with other data.
While this works for a one-time snapshot, you’ll need to repeat these steps each time you want updated numbers, and for each client organisation you're working on. Pros: No extra software needed, you have full control over what data you export.
Cons: It’s time-consuming to do regularly, prone to human error, and data goes stale quickly. You must repeat the manual export to get new transactions or report updates.
Automate Xero → Excel Sync with CountingKit
Instead of exporting by hand, you can use CountingKit to automatically sync your Xero data into an Excel file stored on OneDrive. CountingKit’s integration uses a secure connections so your spreadsheets stay up-to-date without any manual exporting. Once set up, all new invoices, payments, contacts, etc. flow directly into your Excel workbook on a schedule you choose.
Here’s how it works with CountingKit:
- Connect your Xero account: In the CountingKit dashboard, go to Connections and choose Xero.
- You’ll be redirected to Xero to authorise CountingKit. Select the Xero organization you want to use and click Allow. (You need Xero Admin or Advisor access to authorise.)
- Connect your Microsoft account: In Connections, select Microsoft Excel. Log in with the Microsoft/OneDrive account you want to use and click Accept to grant CountingKit permission to read/write files in your OneDrive. CountingKit supports both personal (Outlook/Hotmail) and work/school accounts, so it’ll save data into your OneDrive (for personal) or OneDrive for Business (for work accounts).
- Add an Excel file as a destination: On the Microsoft Excel integration page, click Add Excel File. You can either create a new file or select an existing one from your OneDrive. The new/existing Excel file becomes the destination for your Xero data. (Make sure you own or have edit access to the file.)
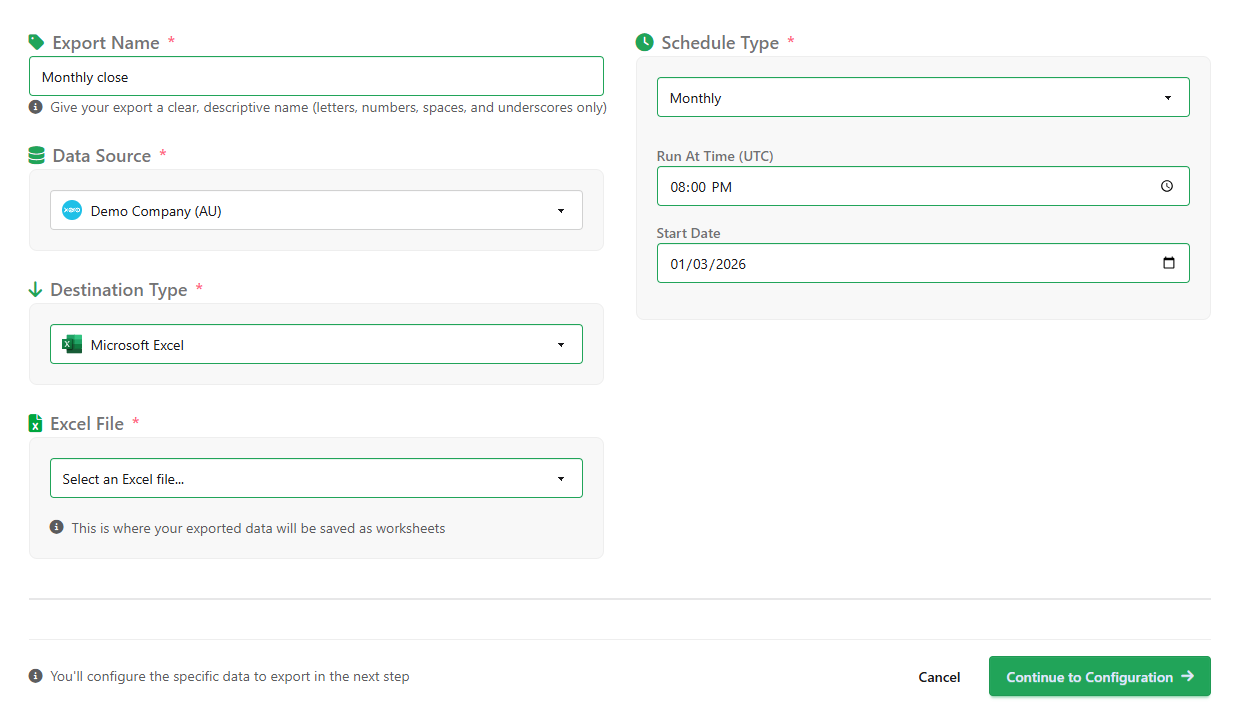
- Create a data export: Now go to the Export Builder (click New Export). Choose Xero as the data source and pick the connected Xero organisation. For the destination, select the Excel file you added. Then configure which Xero data to export. For example, you can add separate tabs (worksheets) for Invoices, Bills, Bank Transactions, Contacts, Financial Reports, etc. Choose the columns or report options you need.
- Set a refresh schedule: Decide how often CountingKit should run the export, such as. hourly, daily, weekly or on your chosen dys. Save or create the export. CountingKit will pull your Xero data into Excel and then repeat on your schedule. Each export run will update the worksheets in your Excel file (either appending new rows or replacing data, as you specify).
After setup, your Excel workbook will automatically fill with live Xero data. For example, one worksheet might contain all invoices, another sheet might have bank transactions, and so on. CountingKit handles the data syncing under the hood, so you don’t have to copy-paste or worry about building scripts.
In short, you connect once and your Xero data automatically appears in Microsoft Excel for reporting and analysis.
Try CountingKit for Automated Xero Reporting
Ready to eliminate manual exports? CountingKit’s free plan lets you connect your Xero and Microsoft account and sync data on autopilot.
Spend your time analysing the numbers not exporting them.
Start syncing your Xero data to Excel today. You’ll never need to copy CSVs again.